
The pattern was by a designer called Melinda Small Patterson. The pattern was so well drafted that it came together perfectly.
Originally I chickened out and decided to make the head without an open mouth...big fail. It turned out very weird looking.

I decided to use some small commercial cat eyes I had in my stash. I took the existing paint off the back using nail polish remover. I then repainted them with Lumiere by Jacquard. I tried a few colours but decided that the Sunset Gold was best with my fabric.
Instead of struggling with making the eyes on the actual head I decided I would make them in another way. I glued the cat eyes (after removing the shanks) onto a scrap of my fabric and then I hand sewed the strips made from the pattern pieces supplied. I carefully cut out my eye from the backing.
This is what I ended up with. A bit rough but once glued to the head it looked very good.


The pattern supplies templates for drawing and sewing the veins in the wings. I decided to use freezer paper instead because my fabric is dark. It seemed easier than using a fabric marker that my old eyes wouldn't be able to see:) .

I also forgot to sew the tail end bit before I turned the body...ooops. It was difficult enough turning it because of that narrow tail but I just added more difficulty by quilting the chest area.
I used a thin batting that I think is called "Warm & Natural". It's
almost like a thick pellon or felt. I guess felt would work too.
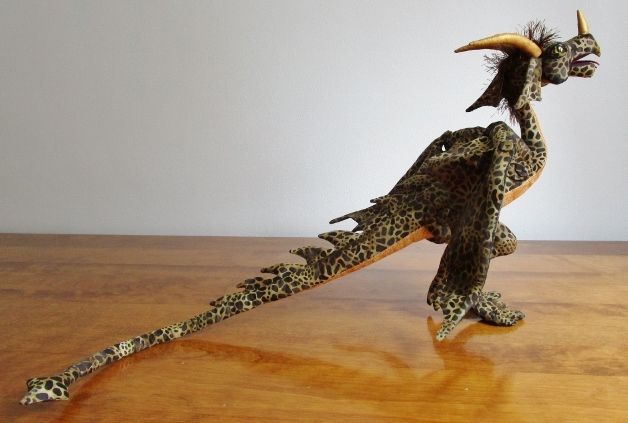
 My mistake with the tail was serendipitous actually. I intend to stuff
the tail rather than use sand as the pattern suggests. I also want to
use an armature so the open tail will work out better. See how I
rationalize my mistakes....LOL If I read all the directions first I
wouldn't have as many ooops moments.
My mistake with the tail was serendipitous actually. I intend to stuff
the tail rather than use sand as the pattern suggests. I also want to
use an armature so the open tail will work out better. See how I
rationalize my mistakes....LOL If I read all the directions first I
wouldn't have as many ooops moments.

I had some issues with the wings though. I think I may have overstuffed them and made them a bit too heavy. I had to unpick the buttons a few times trying to get them tighter so that I could pose them.They keep on flopping down. Next time I might make the wing in one piece and then wire them.
So here he is.


Take care.
VERY cool! Mistakes or not...it turned out incredible!
ReplyDeleteThank you Lin. Some of the best things I've made were because of one of my ooops moments....:)
Deleteoooooh - he's amazing!!!!!!!!!!!! Your dragon and my Ellryon need to get together!
ReplyDeleteThank you:) I think I may be hooked on making dragons.
DeleteHe is brilliant! xx
ReplyDeleteThank you Lin:)
DeleteAaah! He’s cute! I love those eyes. Well done!
ReplyDeleteBarbara x
Thank you very much:)
DeleteI love him. Thank you so much for showing a pic of how the eyes are done. I always wondered how to put lids on a doll.
ReplyDeletexx, Carol
Thank you :) The pattern instructions called for beads but since I was using something different I did my own thing.
Delete